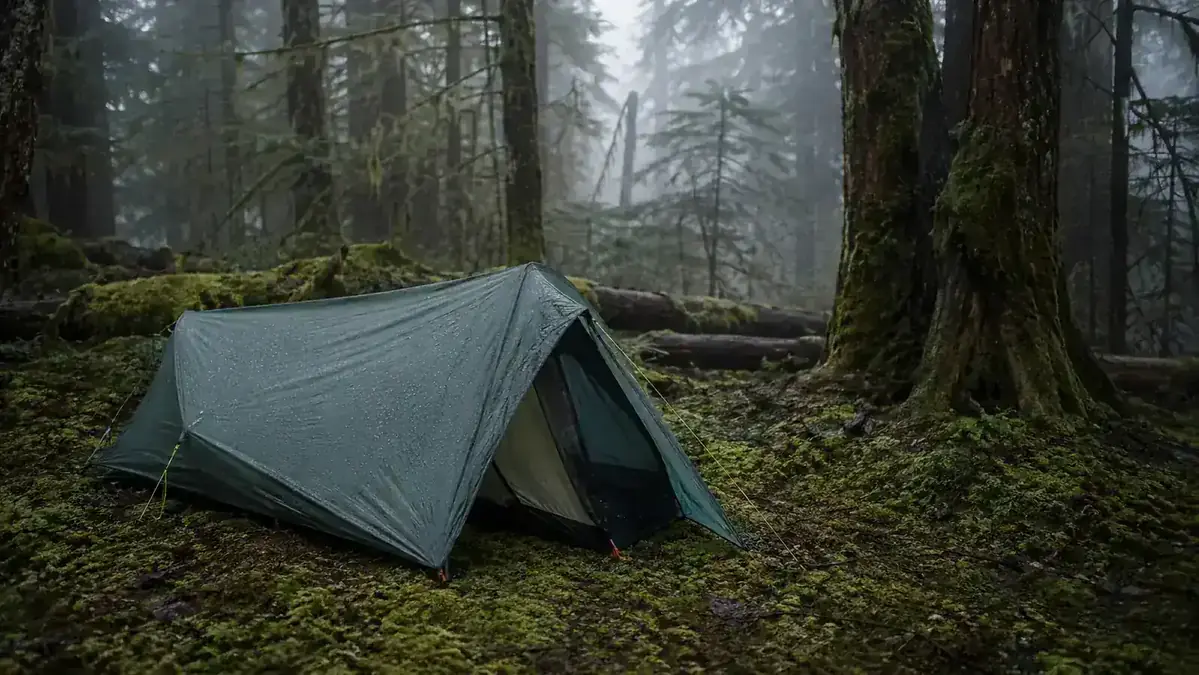
Here is the thing nobody puts in a Naturehike Cloud-Up review: the first time you set it up, you are going to fight the poles. Not because the tent is complicated, but because the instructions are a single folded sheet with line drawings the size of a postage stamp, the pole sleeves are tight on the first three or four uses, and the clip attachments at the tent base are stiff enough that if you're doing this in fading light after a nine-mile day, you will say some words you won't repeat to your kids. I set up the Cloud-Up for the first time at a campsite near Packwood, Washington, in late September. Overcast, 52 degrees, threatening rain. Took me 22 minutes. The learning curve is real, and nobody in the listing mentions it.
That said, I am still carrying this tent. I bought the Naturehike Cloud-Up 2P about eight months ago and have used it on six trips across Washington State and the Missouri Ozarks. The pole-threading issue resolves by trip two. What I want to tell you are the things that took me by surprise, both the good surprises and the ones that made me dig into the return window before deciding to keep it.
The Quick Verdict
A capable three-season tent that earns its keep on weight and weatherproofing. The setup learning curve, the vestibule drain position, and the zipper stiffness on the first dozen uses are real friction points that most reviewers skip. They are all manageable. You should just know about them before you buy.
Amazon Check Today's Price →If you're on the fence between this and something twice the price, look at the current price first. The gap may not justify the upgrade.
The Naturehike Cloud-Up 2P ships with a footprint. Sub-2.5-lb total with the footprint included is genuinely unusual at this price point. Check what it's actually selling for today.
Amazon Check Today's Price on Amazon →The Setup Reality That Nobody Talks About
The Cloud-Up uses a clip-and-sleeve hybrid pole attachment system. The main body of the arch poles threads through two fabric sleeves at the top of the inner tent, then clips to grommets at the base. In theory this is quick. In practice, the sleeve fabric is cut tight from the factory and the poles do not glide smoothly until the fabric relaxes after a few uses. On my first trip near Packwood, I bent one pole section slightly trying to force it through before I figured out the right angle. It bent back without cracking, and the pole is fine now, but it was a tense moment.
By trip three, solo setup was down to nine minutes. By trip five, I was at seven minutes. That is a perfectly acceptable setup time for a tent this light, but the improvement requires those first two trips. If you are buying this for a first backpacking trip with no prior tent experience, practice the setup in your backyard before you leave. The instructions will not walk you through it adequately.
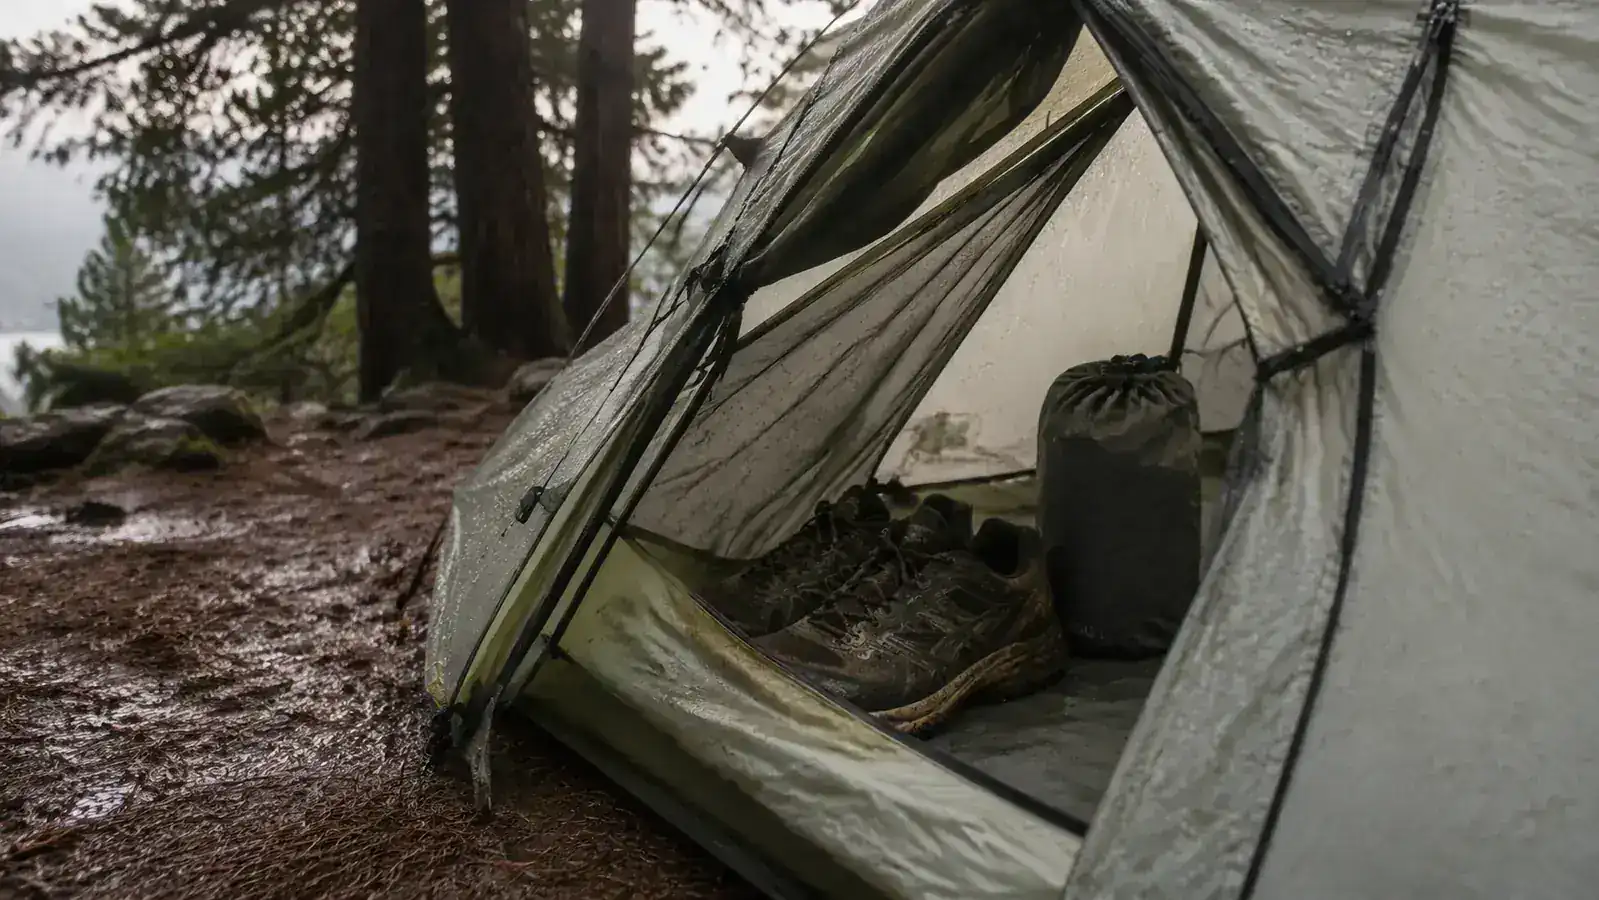
One more setup note: the vestibule stake positions are not clearly marked. There are two guyline loops at the fly corners and two stake-out points at the vestibule base, but the fly drapes oddly if you stake the vestibule before tensioning the back corner of the fly. The correct sequence is: stake the tent body footprint corners, erect the poles, attach and tension the fly back corner first, then stake the vestibule. Do it in the wrong order and you get a vestibule door that pools instead of shedding rain. I figured this out on trip two in the Ozarks during a 45-minute drizzle. My boot got wet. The tent floor stayed dry.
What Surprised Me About the Weatherproofing
The fly is 20D ripstop nylon, 3,000mm waterhead rating. Those numbers are accurate and the tent performs to them. What surprised me was how much the vestibule stake sequence matters for keeping rain out of the vestibule itself. When I got that sequence right on my third trip, a sustained Ozark rain that dropped about three-quarters of an inch overnight left my boots completely dry in the vestibule. When I got it wrong on trip two, there was an inch-wide pool that formed in the far corner of the left vestibule and soaked the heel of one boot. Not the tent's fault. My sequencing fault. But worth knowing.
The floor is 210T polyester with a 5,000mm rating. I pitched on hardened Ozark limestone on one trip and on soft, wet silt near a creek on another. Neither site produced a wet spot on the floor. The bathtub construction with the seam running up the wall rather than at ground level is the right design for any pitched-on-questionable-ground situation. I have zero complaints about the floor.
What the 3,000mm rating does not protect against: a tent pitched under dripping Douglas fir branches on a foggy Pacific Northwest morning. On my Packwood trip, I woke up to water dripping off the branches onto the fly at about a half-inch-per-hour rate for four hours. None of it came through the fly. But where the fly contacted the overhanging branch, the friction point darkened from prolonged contact. It dried and there is no damage, but persistent branch contact will eventually degrade the DWR coating faster than precipitation alone. Pitch away from overhanging branches when you can.
The floor held on limestone. The floor held on creek silt. Every real complaint I have about this tent is about the vestibule setup sequence and the door zipper, not the thing that actually matters most: whether you wake up wet.
The Zipper Situation: Honest Assessment
The door zipper is YKK-style on the inner tent and a lighter coil zipper on the fly vestibule. Both are functional. Neither is exceptional. The inner door zipper was stiff enough on the first six or seven outings that I had to use two hands to start the zip from the bottom, which matters at 6 a.m. when it is 38 degrees and you need to leave the tent without waking your tentmate. By outing eight, it had loosened to a normal pull. Running a wax candle stub on the coil after outing four sped up that process significantly. If you buy this tent, take a paraffin candle stub with you on the first trip. It costs nothing and fixes two-thirds of the zipper stiffness immediately.
The vestibule zipper is lighter gauge and has remained smooth throughout. I have no concerns about it at eight outings. The thing I do keep an eye on is the point where the door zipper track meets the zipper garage at the top of the door. On some entry-level tents this is where the zipper starts to separate. On the Cloud-Up it is holding cleanly, but it is the spot I check first each time I pack the tent.
Weight and Pack Size: The Published Numbers Versus My Scale
The Amazon listing says 2 lbs 6 oz with footprint. My postal scale read 2 lbs 10 oz when I weighed the tent, poles, stakes, footprint, and both stuff sacks together. That is a 4-ounce discrepancy, which is fairly common with Chinese tent brands. The listing weight likely reflects the tent body, poles, and fly without the footprint and stakes. For a backpacker tracking ounces this matters. For a weekend camper doing 5-mile day hikes to a campsite, it does not matter at all.
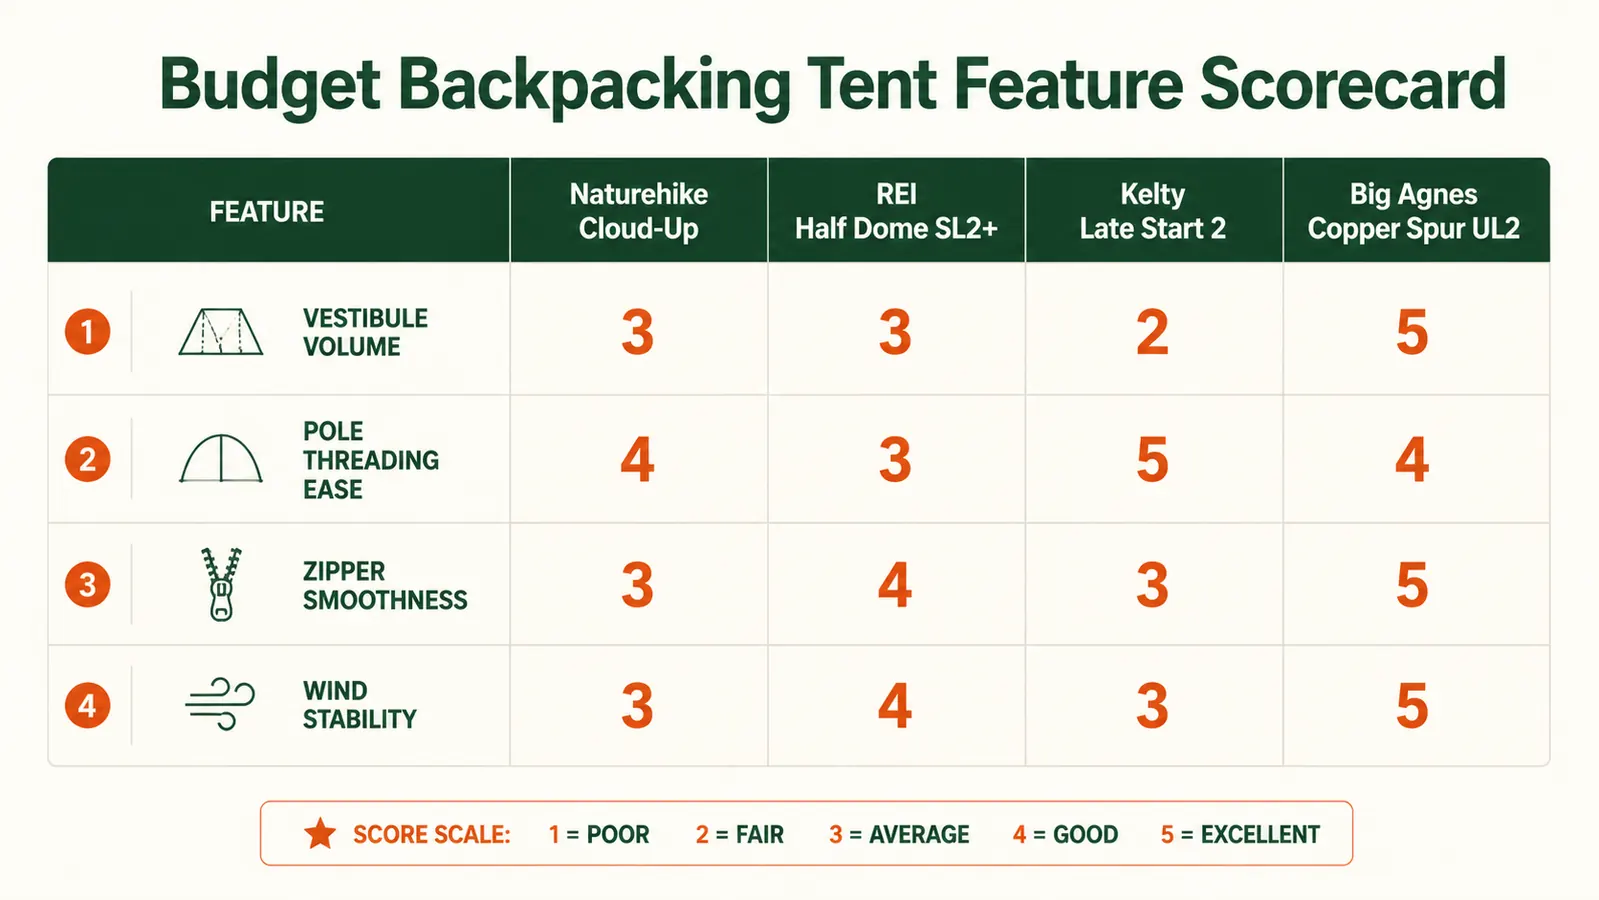
At 2 lbs 10 oz all-in, it is still one of the lighter two-person tents in the sub-$150 market. The REI Half Dome SL 2+ with its footprint is closer to 4 lbs 2 oz. Even accepting the 4-ounce difference from the listing, you are getting real weight savings for the category. Packed into the compression sack, it sits comfortably at the base of a 45-liter pack. On my solo trips I have been fitting it, my sleeping bag, and a quilt into the bottom of a 40-liter bag with room for a day's food on top.
Interior Space: What Two People Actually Experiences
I am 5'10" and have shared this tent with a friend who is 5'8". We fit. We had maybe 6 inches of clearance at shoulder height and roughly 2 inches of gap between our sleeping pads. Our boots went in the vestibule, our packs went under the vestibule, and everything that needed to be inside went into the two mesh pockets. It is workable for a one- or two-night trip where you spend most of your tent time horizontal.
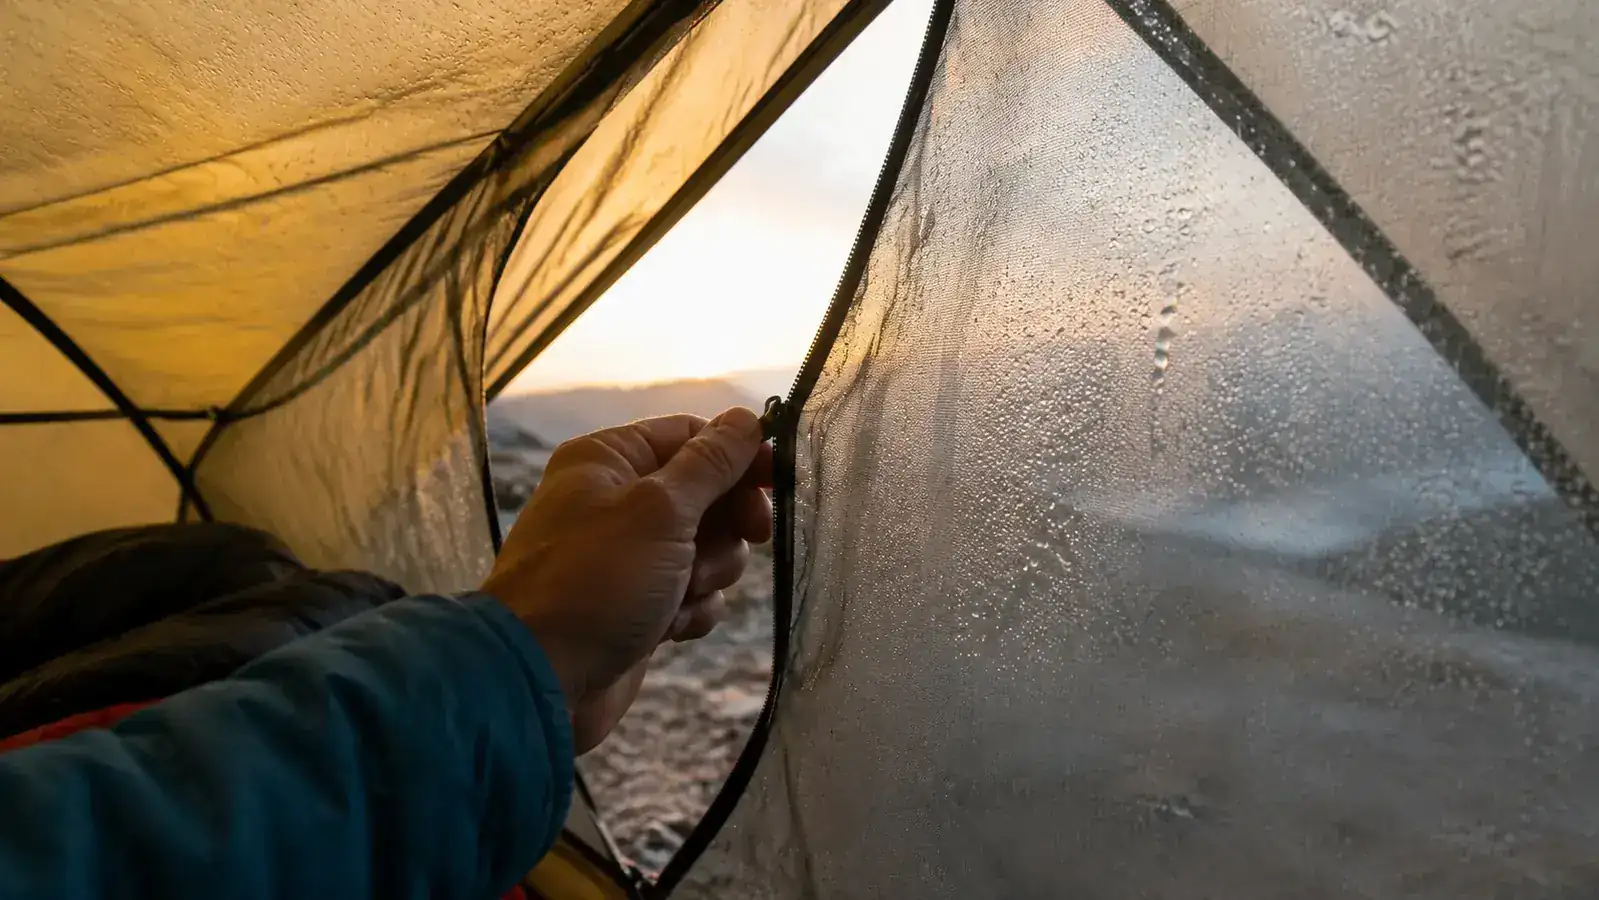
Where it gets tighter: if either person is a restless sleeper who moves laterally during the night, they will brush the inner mesh wall. On cold nights the inner mesh will have condensation on it from the air differential, and a brushed sleeve against damp mesh is how sleeping bag loft gets compromised over a multi-night trip. The fix is the same fix as always: keep the fly tensioned, crack the vestibule zipper a few inches for airflow, and try to sleep in your compression bag liner on nights when you expect heavy condensation. None of this is specific to the Cloud-Up. It is the physics of lightweight double-wall tent design. But it is the honest experience.
Peak headroom is about 38 inches at the center ridge. I can sit up to pull on a base layer. I cannot change pants without contorting in a way that my knees find disagreeable. For reference, the MSR Hubba Hubba NX 2P peaks at 42 inches and feels noticeably roomier in the sit-up test, but costs roughly $300 more. At this price tier, the Cloud-Up is not uniquely cramped. It is just not spacious.
What I Liked
- Real sub-3-lb weight with footprint included; verified at 2 lbs 10 oz on my scale with all components
- 3,000mm fly and 5,000mm floor have stayed watertight across six trips including sustained Ozark rain
- Freestanding inner pitches dry before you attach the fly, critical for rainy arrivals
- DAC-equivalent aluminum poles have held shape through six setup-and-breakdown cycles without issue
- Vestibule is genuinely useful for boots and small packs, not just a nominal flap
- Compression sack packs the whole tent to roughly the size of a 1-liter Nalgene plus a wide-mouth Nalgene
- Footprint included in the box, not sold separately as it is with many competitors
Where It Falls Short
- Setup learning curve is steeper than the listing implies; plan for 20 minutes on your first pitch
- Published weight is 4 oz lighter than actual when all components are on the scale
- Door zipper requires wax conditioning for smooth single-hand operation in the first dozen uses
- Vestibule stake sequence is unintuitive; wrong order leads to a draining problem that pools water near your boots
- Shoulder-to-shoulder clearance is tight for two people over 5'10" with standard-width sleeping pads
- Only four stakes included; wind performance needs four additional stakes for exposed sites
The Specific Things Most Reviews Get Wrong
Most Cloud-Up reviews online read like they came from a single overnight in good weather. They mention the weight is good, the setup is fast, and the rain fly held up. All of that is true. What they miss: the tent's real vulnerability is not weatherproofing, it is the learning curve on the vestibule tension and the door zipper stiffness. Both are solvable. But if you go into your first trip expecting plug-and-play performance, you will be annoyed. If you go in knowing about both issues, you will be prepared and it will not affect your trip.
The other thing that gets glossed over is ventilation management. The Cloud-Up has four ventilation panels: two at the top of the fly and two at the lower sides. On dry nights above 45 degrees, leaving the top panels open creates enough airflow to keep condensation minimal. On wet nights under 45 degrees, closing everything keeps you warmer but generates more condensation against the inner mesh. There is no setting that solves both problems simultaneously. You manage the tradeoff. Most tents in this category work the same way; the Cloud-Up is not worse than its peers. You just have to actively manage it rather than ignoring ventilation entirely.
Who This Is For
If you are a weekend backpacker doing two- to three-night trips in three-season conditions and you want a tent under 2.75 lbs all-in without spending more than $150, the Cloud-Up is one of the only options in the market that actually delivers on both requirements. It rewards a small amount of pre-trip practice and some knowledge of how to tension a fly and manage ventilation. Gear-curious buyers who do their homework get a lot of tent for the price. Buyers who expect it to be foolproof out of the box on the first pitch may be frustrated.
It also works well as a solo tent used in the 2P configuration. The extra floor space lets you keep a pack or camera gear inside, and the vestibule handles all footwear without being crowded. That is how I used it on three of my six trips and it was comfortable in that configuration. If you want to see how the Cloud-Up compares directly to the MSR Hubba Hubba on specs and field performance, the full side-by-side is in the comparison article.
Who Should Skip It
If you are buying your first tent ever and have never pitched any tent before, I would start with something less finicky on the first setup, like a REI Half Dome or a Kelty Late Start. Those tents cost more per ounce but have clearer setup sequences and easier vestibule management. The Cloud-Up's weight advantage is only relevant once you care about pack weight, and most first-time buyers are not there yet.
If you do above-treeline camping in regularly windy conditions, the four-stake-only system is genuinely inadequate. You need a tent with four proper guyline attachment points and eight or more stakes, like the Big Agnes Tiger Wall or the MSR Hubba Hubba. The Cloud-Up can be augmented with extra guylines and stakes, but you are engineering solutions around a design limitation rather than buying the right tool for the environment.
And if you are doing a thru-hike where the tent goes up and comes down every single day for four or five months straight, the zipper and velcro attachments may not make 500 miles without a maintenance stop. This is a weekend-to-moderate-use tent, not an expedition shelter. It is priced and built accordingly. For everything in that range, though, including the 30 to 40 nights per year use case that describes most serious weekend hikers, it is holding up fine.
Still carrying it after six trips. The frustrations are real but they are front-loaded. Check today's price before you decide.
The Naturehike Cloud-Up 2P includes the footprint. Sub-3-lb total weight with footprint and stakes is rare under $150. Worth comparing to whatever else is on your short list.
Amazon Check Today's Price on Amazon →