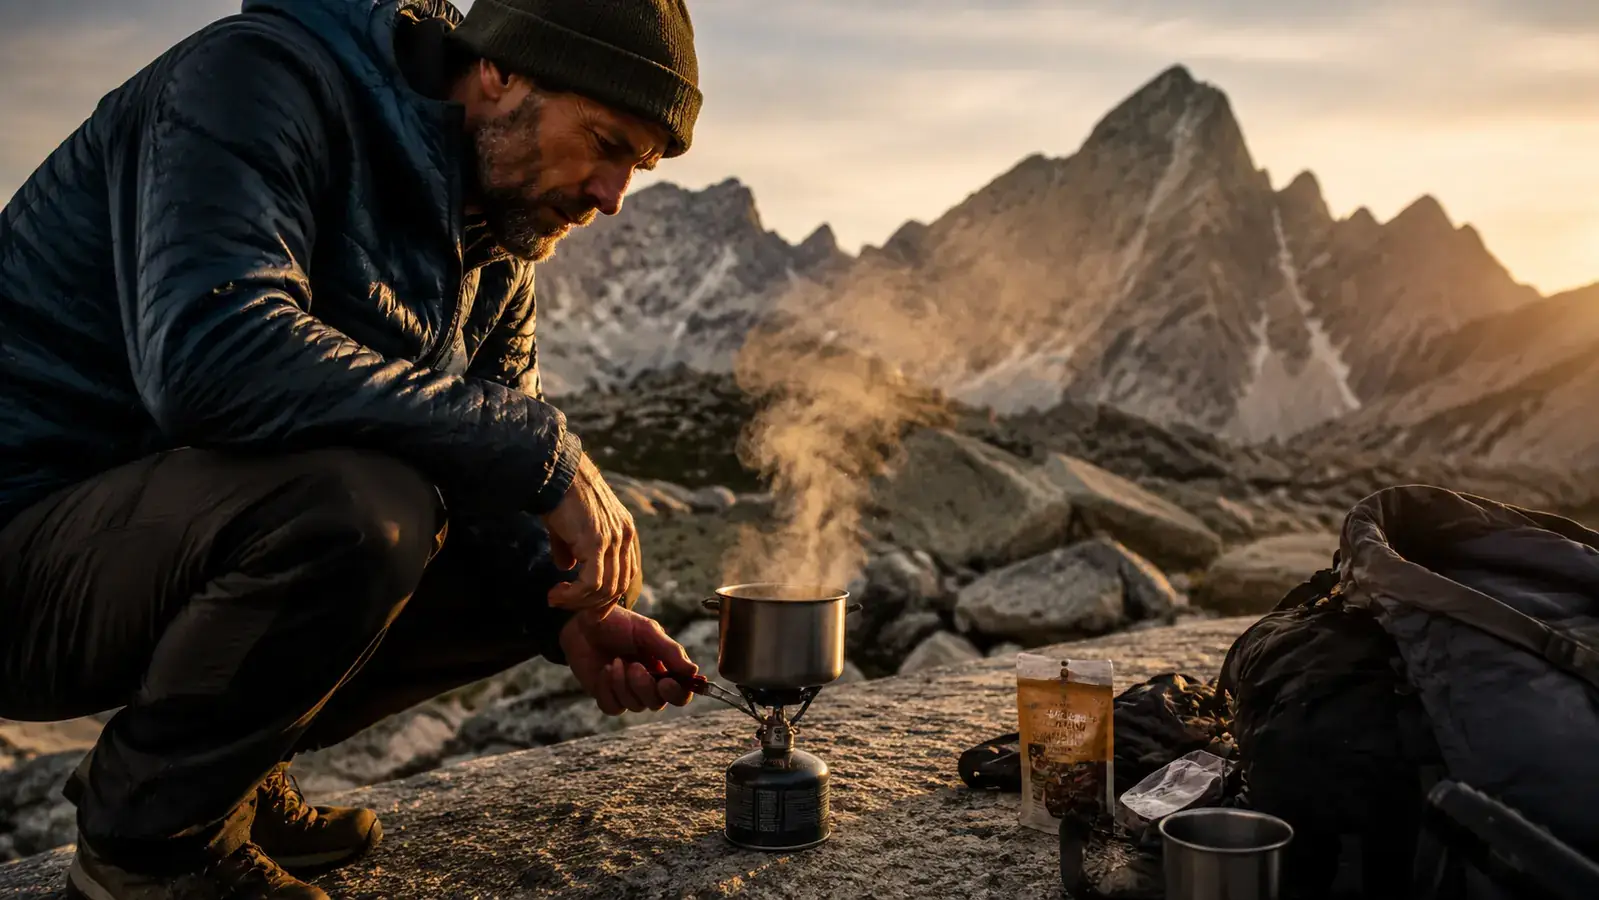
Most people who end up eating cold food on the trail did not plan to. They packed heavy, cut corners on the cook kit to save money, or grabbed the first stove they saw without thinking through fuel logistics. I have been there. My first two overnight trips I carried a 12-ounce camp stove, a full steel pot, and a bag of instant mashed potatoes. I ate warm food, technically, but the cook kit alone weighed more than my sleeping bag. After a few seasons of testing gear, I landed on a setup that weighs under five ounces total and still gets water boiling in under four minutes. The BRS-3000T titanium stove is the center of that system, and this guide walks through how to build the whole thing from scratch.
This is a step-by-step field guide, not a gear list. The steps apply whether you are on your first overnight or your fiftieth. Each step covers one decision point: what to choose, why it matters, and the specific mistake I see people make at that stage. Follow them in order and you will have hot food at camp, every trip, without sacrificing meaningful pack weight to get it.
Tired of skipping hot meals because your cook kit weighs too much?
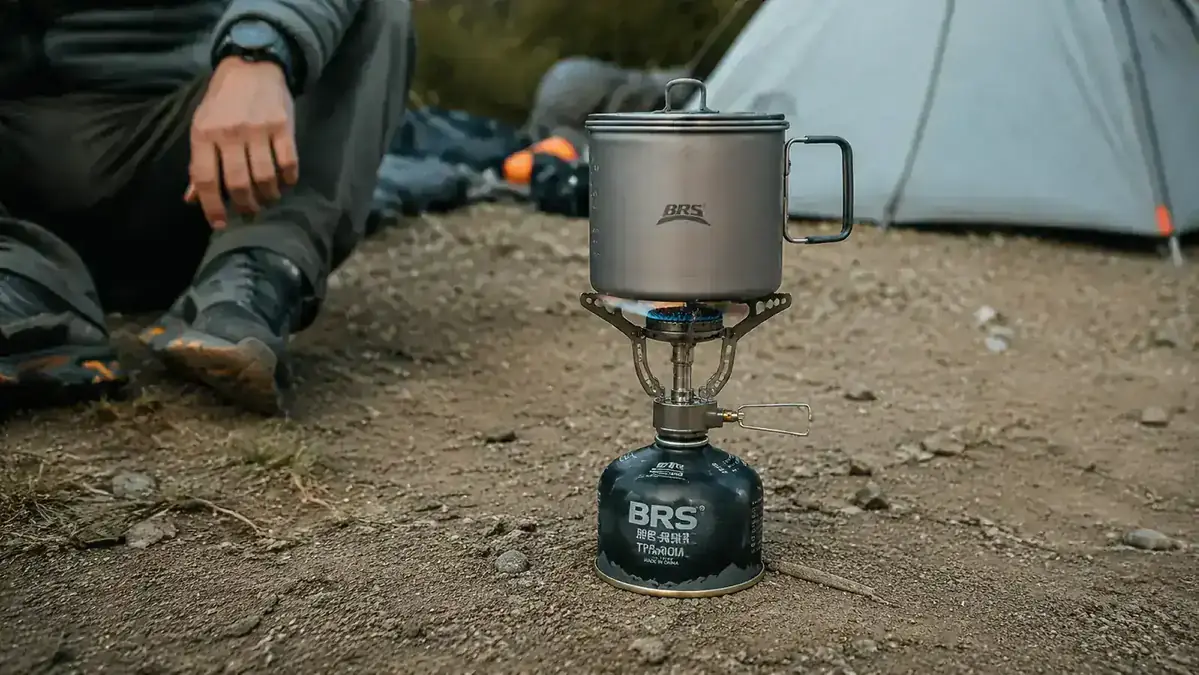
The BRS-3000T weighs 26 grams, packs into a small stuff sack, and screws directly onto any standard isobutane canister. Over 4,400 backpackers have rated it 4.6 out of 5 stars. It is the stove I reach for on every trip where pack weight matters.
Amazon Check Today's Price on Amazon →Step 1: Choose the Right Stove for Your Trips
The stove decision comes before everything else because it locks in your fuel system, your pot size, and your cook time expectations. For most backpackers, a top-mounted canister stove is the right call. It screws onto a standard isobutane-propane canister (the kind you find at REI, Walmart, and most outdoor retailers), it has no moving parts to break, and it is fast to set up and break down. The alternative systems, alcohol stoves and integrated canister systems like the Jetboil, both have real use cases but also real limitations. Alcohol stoves are cheap and light but slow in cold weather and impossible to modulate. Integrated systems are fast but bulky and expensive.
For three-season backpacking, the BRS-3000T is the lightest top-mount canister stove made. It weighs 26 grams, which is roughly the weight of four pennies. The burner folds out to three arms, it produces 2,700 watts of output, and it holds a pot up to about a liter before it starts to feel unstable. For boiling water for freeze-dried meals, instant oatmeal, coffee, or ramen, it is entirely sufficient. The one honest limitation: in sustained winds above 15 mph, it struggles without a windscreen. We will cover that in Step 3.
If you do most of your camping at elevation above 10,000 feet or in winter, a stove with a pressure regulator handles cold canisters better. But for 95 percent of three-season backpackers, the BRS-3000T performs fine and the weight savings versus alternatives like the MSR Pocket Rocket 2 (73 grams) are real and meaningful over a long trip.
Step 2: Understand Fuel Math Before You Leave the Trailhead
Fuel math is the step most beginners skip, and it is the reason people run out of gas on day three of a four-day trip. The rule of thumb I use: a 100-gram canister of isobutane fuel is good for roughly 10 to 12 boil cycles of two cups each under decent conditions. A 230-gram canister extends that to 25 to 30 cycles. For a solo backpacker doing one hot breakfast and one hot dinner per day on a three-day trip, a 100-gram canister is usually enough. Add a second person or a fourth day and step up to the 230-gram.
A few factors reduce your fuel efficiency more than people expect. Cold temperatures make the canister less efficient because the fuel does not vaporize as readily. Altitude does the same thing, just to a lesser degree. Wind is the single biggest fuel waster, which is why windscreen technique in Step 3 matters. If you are camping in temps below 40 degrees regularly, add 20 percent more fuel to your estimate. Keep the canister warm before a morning cook by sleeping with it in your sleeping bag. That sounds unusual but it actually makes a noticeable difference in boil time on cold mornings.
Step 3: Set Up a Windscreen Before You Light the Stove
Wind is the enemy of efficient backpacking cooking and the most overlooked part of a cook setup. Even a light breeze pulls heat off your pot and increases boil time by 30 to 60 percent, which burns more fuel and wastes time you could spend eating. A proper windscreen solves this without adding meaningful weight. The options are a commercial foil windscreen (these run about one ounce and fold flat), a DIY shield cut from a turkey roasting pan, or natural terrain like crouching behind a boulder or a tree line.
One important safety note for canister stoves specifically: do not wrap a windscreen around the base of the canister itself. The canister needs airflow or it can overheat and become dangerous. Position the windscreen around the outside of the stove system, leaving the canister exposed on one side or using a model that is designed to sit a few inches away. The foil shields sold specifically for canister stoves are already shaped correctly for this. Also: always cook on a stable, flat surface. A tipped pot on a steep slope is a burn risk and wastes the meal you just took 10 minutes to heat.
Step 4: Plan Meals Around Boil-Only Cooking
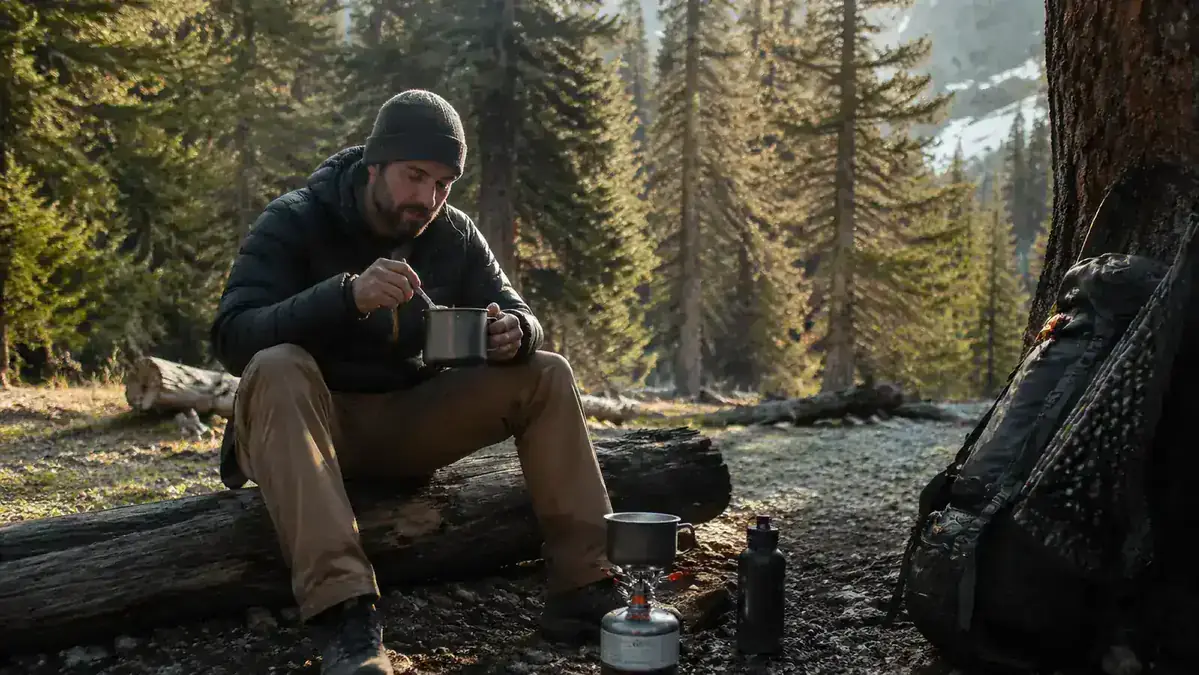
The cleanest backpacking cook system is a boil-only system. You bring water to a rolling boil, add it to your meal, seal it, and wait. No sauteing, no simmer management, no stuck food at the bottom of your pot. Freeze-dried backpacking meals (Mountain House, Backpacker's Pantry, and similar brands) are designed explicitly for this method: boil two cups of water, pour in the bag, zip it closed, wait eight to twelve minutes. The food rehydrates evenly and you eat out of the bag, which means no dishes to clean.
For people who want to cook their own food rather than buy freeze-dried meals, the same boil-only principle applies if you plan around it. Instant mashed potatoes, ramen, couscous, instant beans, and instant oatmeal all work perfectly with just boiling water and a stir. Parboiled rice and instant rice also work. What does not work: pasta that needs 10 minutes of active simmering, raw vegetables that need sustained heat, or anything that needs more than two cups of water per serving when you are managing fuel carefully.
Bring more food than you think you need by calorie count. Backpackers burn significantly more calories than they typically eat on trail, and cold nights increase caloric demand. A reasonable target is 1.5 to 2 pounds of dry food per person per day, aimed at 2,500 to 3,500 calories. If you are on a multiday route at elevation, lean toward the higher end.

Step 5: Clean Up the Right Way and Leave No Trace
Cleanup is the step that separates a responsible campsite cook from one who attracts wildlife and leaves a mess for the next hiker. The Leave No Trace guidelines for backcountry cooking are specific and worth following. Strain all food particles from your dishwater using a small mesh strainer or by pouring through a bandana. Dispose of strained food particles in the trash, not on the ground. Scatter your cleaned dishwater at least 200 feet from your water source, your tent, and your cook area. Dispersing it widely rather than pouring it in one spot reduces the odor concentration that draws animals.
If you cooked in a freeze-dried meal bag, the cleanup is simpler: scrape any residue into the bag, seal it, and pack it out in your garbage bag. Lightweight soap like Dr. Bronner's unscented works well for pot scrubbing, but in most backcountry conditions a thorough rinse with hot water is sufficient. Never wash dishes in a stream or lake, even with biodegradable soap. The concentration of soap in the water immediately around the wash point is high enough to affect aquatic organisms before it has a chance to break down.
Store all food, garbage, and scented items in a bear canister or hang them with a bear bag at least 200 feet from camp and 10 feet off the ground. This includes the stove if it has food residue on it, your fuel canister, and any wrappers. The BRS-3000T is small enough to fit inside most bear canisters alongside your food without taking up meaningful space.
What Else Helps: The Small Things That Make Camp Cooking Actually Work
A lighter. Not a camp lighter with a long snout, which adds weight you do not need, and not a disposable Bic, which fails when wet. A piezo igniter built into a mini lighter like a Xikar works reliably and weighs almost nothing. The BRS-3000T does not have a built-in igniter, so you need a separate flame source. Always carry two: a lighter and a backup set of waterproof matches in a zip-lock bag. I have had a lighter fail on day two of a four-day trip. Cold hands, wet conditions, cheap lighter. The matches saved hot food that night.
A titanium cup or pot in the 550-to-750ml range is the right cook vessel for solo backpacking. It holds exactly enough water for one freeze-dried meal, it is light (a basic titanium 550ml cup weighs around 2 ounces), and it nests around the BRS-3000T and fuel canister for a tight, organized kit. If you are cooking for two people, step up to a 1-liter pot and plan to do two boil cycles for larger meals. Avoid stainless steel at this size range: it is heavier than titanium for no trail benefit.
A pot cozy extends your fuel efficiency meaningfully. Cut a piece of closed-cell foam to fit around your pot and use it to retain heat after you cut the flame. For freeze-dried meals especially, you can boil the water, pour it in the bag, wrap the bag in the cozy, and turn off the stove two to three minutes earlier than you would otherwise. The food finishes rehydrating in the retained heat. Over a three-day trip, that saves a noticeable amount of fuel.
The BRS-3000T weighs 26 grams. My first camp stove weighed 340 grams. I eat the same hot meal either way. The difference is what I can carry with the weight I saved.
One thing people underestimate: pre-trip prep for your meals saves time and fuel at camp. At home, repackage bulk food into individual servings in zip-lock bags. Remove excess packaging. Pre-measure coffee, spices, or instant drink mixes. Label each bag with the water amount and wait time. On trail, you pull out the labeled bag, boil the right amount of water, and you are done. No fumbling with wrappers in the dark, no guessing at ratios after a long hiking day.
If you want to read more about the stove itself before committing, the full BRS-3000T review covers a complete season of field use including wind performance, durability notes after repeated trips, and how it compares to the MSR Pocket Rocket 2 side by side. And if the idea of an ultralight stove still feels like a compromise, the article on reasons an ultralight stove changes your camping covers the practical difference it makes across different trip types and conditions.
The BRS-3000T fits in a shirt pocket and boils water in under four minutes.
If you are still skipping hot meals because your cook kit is too heavy, this is the stove that fixes that. 26 grams, titanium construction, rated 4.6 stars by over 4,400 backpackers. Grab a 100-gram canister of isobutane at the trailhead and you are set for a weekend.
Amazon Check Today's Price on Amazon →